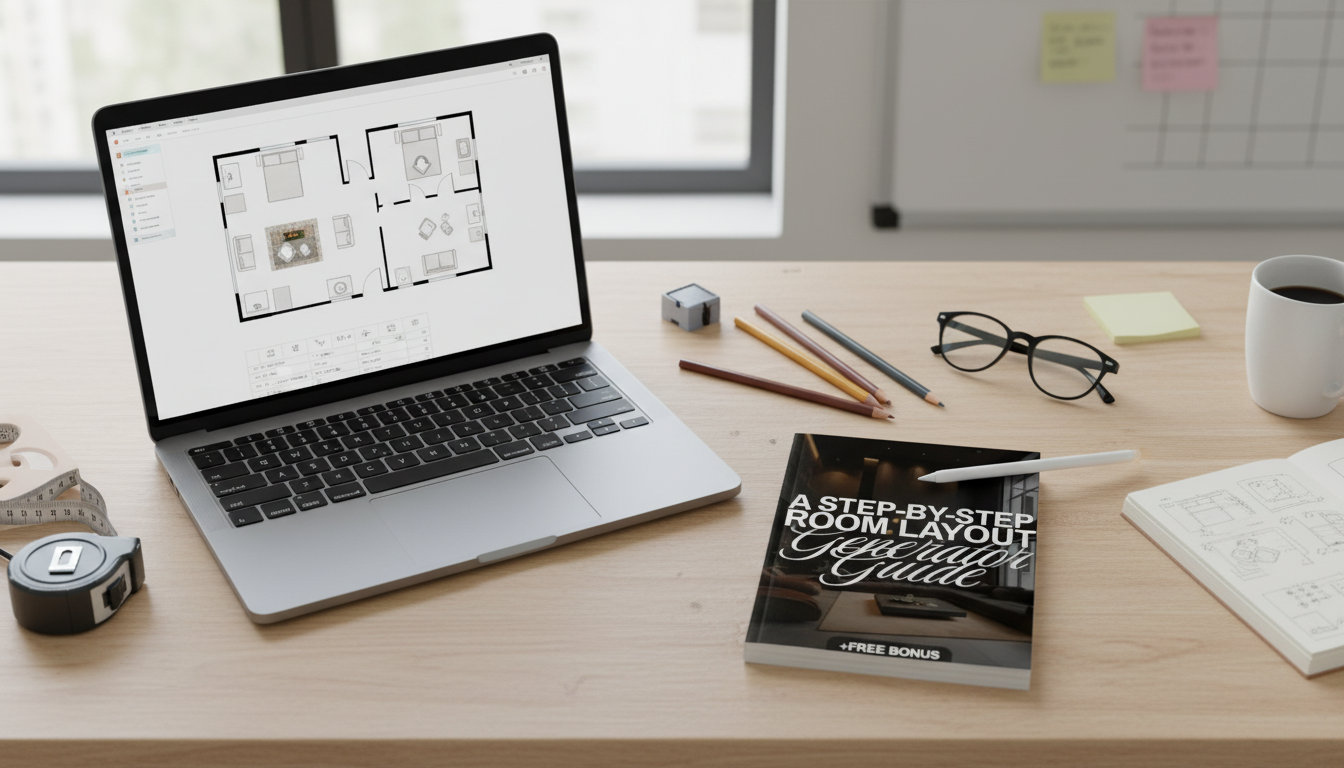
An AI room layout generator is most useful when decisions feel stuck—especially in a blank room, an awkward open plan, or a space with multiple “must-haves.” With the right inputs, it can quickly produce several arrangement ideas, including focal-wall setups, conversation groupings, and zoning concepts that separate lounging from working or dining.
It’s also a strong visual thinking tool: seeing scale, balance, and the “shape” of circulation can make it easier to choose a direction before spending money or moving heavy furniture.
What it can’t do is guess your real dimensions. If door swings, window placements, or furniture sizes are off, the output won’t translate well. The best approach is to treat AI as an ideation partner—generate options fast, then validate them against real-life clearances and everyday routines.
Layouts get dramatically better when the inputs are specific. Start with the room’s length, width, and ceiling height, then note anything that affects placement: baseboards, radiators, vents, built-ins, and outlets. Next, record doors (location and swing direction) and windows (width and sill height) so you don’t accidentally block access or light.
Then list your “non-negotiables.” Examples: seating for four, a desk for two monitors, a TV size, dining for six, a play zone, or a pet setup. Finally, gather furniture dimensions (existing and planned): sofa width/depth, rug size, bed size, dresser depth, dining table footprint, and any storage pieces.
One more decision helps everything click: choose the primary focal point. That might be the TV wall, fireplace, a picture window, or simply the best natural light for reading and work.
Pick the primary activity (relaxing, working, entertaining, sleeping) and identify secondary needs (storage, hobbies, pets, or kids). This prevents a “pretty” plan that doesn’t match your day-to-day.
Mark no-go zones early: door clearance, walkway routes, vent/radiator access, and window operability. If you’re planning for accessibility or safer egress, it helps to reference established guidance like the ADA Standards for Accessible Design and baseline safety considerations described in NFPA 101 (Life Safety Code).
Start with anchor pieces (sofa/bed/dining table/desk), then add supporting pieces (chairs, side tables, lamps, shelving). If you’re planning to buy, lock in the maximum footprint you can comfortably fit—then shop within that boundary.
Ask for distinct approaches rather than minor tweaks: one symmetrical plan, one with floating furniture, one perimeter-based option, one conversation circle, and one split-zone version for open plans. Save each variation with a label that describes the benefit (for example, “best for hosting” or “best for workdays”).
Check the plan like a daily walkthrough: entry to seating, seating to kitchen, bed to closet, and anywhere doors or drawers open. If the layout is tight, reduce piece count before reducing circulation—fewer well-scaled items almost always feels better than squeezing in “one more” table or chair.
| Area to check | Comfortable target range | Why it matters |
|---|---|---|
| Main walkways | 30–36 in (76–91 cm) | Prevents bottlenecks and makes the room feel open |
| Around a bed (one side minimum) | 24–30 in (61–76 cm) | Easier making the bed and daily movement |
| Dining chair pull-back space | 24 in (61 cm) behind chair | Allows seating without constant shuffling |
| Coffee table to sofa distance | 14–18 in (36–46 cm) | Comfortable reach without crowding knees |
| TV viewing distance (general) | Varies by screen size | Improves viewing comfort; confirm for the exact TV size |
Turn the digital plan into a checklist: exact size requirements for each item, a moving plan (what gets shifted first), and a styling list for the finishing layers (rug, curtains, lighting, and art placement). For a ready-to-use workflow, see A Step-by-Step Room Layout Generator Guide (Digital eBook Download).
Storage: Assign homes for remotes, throws, mail, shoes, and pet supplies. If your layout includes a pet corner, a practical item like the Quality Plastic Cat Litter Box can help keep that zone contained and easier to clean.
Once the furniture placement works, the “finished” feeling comes from defining zones and balancing visual weight. Anchor your main seating area with a properly sized rug that catches at least the front legs of major pieces. For a playful, statement look that still reads as a zone-definer, consider the Adorable Panda & Dog Shaped Rug.
Prioritize room length and width, door locations and swing direction, window locations, and the exact width and depth of your largest furniture pieces. Also note fixed obstacles like radiators, vents, and built-ins so circulation and access don’t get blocked.
Generating 3–6 distinct options usually provides enough variety to compare trade-offs. Validate each option with clearances and your daily routines, then pick the one that stays comfortable even on busy days.
It can suggest strong starting points, especially for basic spacing and zone definition. Final choices should be confirmed with rule-of-thumb clearances and the actual rug and furniture dimensions in your room.


Leave a comment